
Why Electricity Is Not Required to Keep Winter Produce Fresh
Autumn can leave a grower with an awkward imbalance: a generous harvest arrives all at once, while the kitchen fridge offers only a few shelves. Maincrop potatoes, carrots, beetroot, swedes and parsnips need somewhere cool and dark to wait, and winter squash can occupy a surprising amount of room before it is ready for the pan. The good news is that a powered appliance is not the only answer. With the right preparation, ordinary sheds, garages, porches, cupboards and patches of well-drained ground can all become useful seasonal stores capable of keeping potatoes, carrots, and squash firm and mould-free right through until early spring.
Traditional British farm practice was built around this very problem. Before electric refrigeration, growers relied on earth, straw, sand, airflow and careful observation. The method works because different crops have fundamentally different physiological requirements. Root vegetables and tubers are living underground storage organs that lose water quickly in dry air, yet potatoes require distinct temperature thresholds and total darkness compared to hardy roots. Winter squash are mature fruits from a warm-growing vine, keeping best when cured and stored in a dry, moderately warm, well-ventilated place. Understanding these contrasts is the foundation of a reliable winter larder.
Understanding the Tale of Two Climates for Winter Storage
Roots such as carrots, beetroot, swedes and celeriac are best treated as though they were still in the soil. They need temperatures just above freezing (0 to 4°C), very high humidity to prevent shrivelling, and enough ventilation to prevent stagnant condensation. Darkness helps prevent unwanted top growth. Parsnips and some hardy roots may remain in the ground under thick mulch, but lifted roots must be protected from both desiccating air and deep freezing.
Maincrop potatoes occupy a specific middle ground. As swollen underground stems (tubers), they demand total darkness; exposure to light triggers the synthesis of green chlorophyll accompanied by solanine, a toxic and bitter glycoalkaloid. Unlike carrots, potatoes should never be chilled near freezing. Storing potatoes below 4°C causes cold-induced sweetening, a physiological disorder where starches convert rapidly into reducing sugars, ruining their cooking texture and causing excessive browning. Ideally, potatoes are cured first for 10 to 14 days at 10 to 15°C with high humidity to toughen skins and heal superficial wounds, then held between 4 and 7°C in breathable, lightproof packaging.
Winter squash has almost the opposite preference to underground crops. It needs to finish maturing, develop a firm rind and heal small surface wounds before it is placed in storage. A damp cellar encourages mould on squash, while a dry pantry causes carrots to become limp and rubbery. Apples and pears should also be kept away from stored potatoes and roots where possible, because ripening fruit releases ethylene gas, which encourages premature sprouting and decay. For a useful overview of root storage conditions and preparation, see this guide to storing root vegetables and this Authoritative Source.
| Crop group | Preferred temperature | Humidity and light | Suitable places |
|---|---|---|---|
| Carrots, beetroot, swedes and celeriac | Just above freezing, up to about 4°C | High humidity (90-95%), dark, gently ventilated | Damp sand boxes, clamps, cool garages or unheated outbuildings |
| Maincrop potatoes | 4 to 7°C (strictly above 4°C to prevent sweetening) | Moderate to high humidity (85-90%), pitch black | Breathable hessian sacks, dark slatted crates, insulated clamps |
| Parsnips and hardy roots | Near freezing, provided they do not freeze solid | Moist soil or protective mulch | Well-drained garden ground or covered outdoor clamps |
| Winter squash | About 10 to 15°C after curing | Dry to moderately humid (50-70%), ventilated | Dry pantry, spare bedroom, frost-free porch or slatted shelves |
These are practical ranges rather than rigid rules. Temperature stability matters as much as the exact reading. Repeated freezing and thawing destroys cell walls in roots and tubers, while temperatures dipping below 10°C will induce chilling injury and decay in winter squash. A simple maximum-minimum thermometer is a worthwhile investment to track swings across your chosen storage spaces.
Building an Outdoor Straw and Earth Clamp for Garden Roots and Potatoes
An outdoor clamp-historically known in various counties as a pie, tumpe, or grave-is a time-tested method for storing large harvests of roots and potatoes without indoor cellar space. The principle is straightforward: a mound of produce is insulated with clean straw and protected by a casing of banked soil. The thermal mass of the surrounding earth buffers outside fluctuations, while thick straw protects against frost and lets moisture transpire.
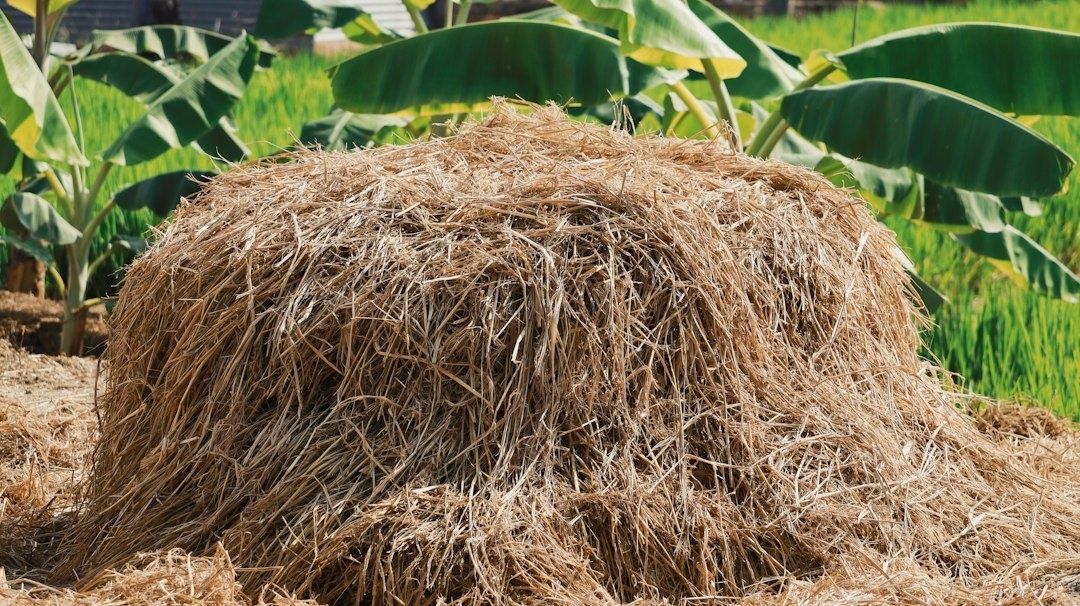
Site selection determines whether the clamp succeeds. Choose firm, free-draining ground on a slight slope if possible, away from downpipes, hollows and areas that puddle during winter rain. A clamp should be accessible enough for regular winter visits, but sited away from compost heaps and dense hedge lines where rodents congregate. Lift roots and potatoes on a dry day. For potatoes, allow them to air-dry for a couple of hours on the soil surface to set skins before clamping; reject any tuber or root that is cut, bruised, blighted or soft.
- Prepare the base. Mark out a strip or circle on bare earth and scrape out a shallow, well-drained depression (around 5 to 10 cm deep). Lay galvanised fine wire mesh across the soil base if rodents or burrowing voles are prevalent.
- Add bedding. Lay a generous bed of clean, dry cereal straw at least 15 cm thick across the floor. This separates the produce from cold, wet soil and provides an insulating air cushion.
- Build the pile. Arrange sound roots or cured potatoes in a compact conical mound or ridge-shaped clamp, with the broadest part at the bottom and a gently narrowing top. Keep crops in separate clamp sections or distinct mounds, as potatoes require absolute exclusion of light and are sensitive to rot if mingled with wet-packed taproots.
- Cover with straw. Lay an unbroken, thick thatch of dry straw over the ridge or cone, working from the base upwards so rain sheds off the stalks. Aim for a compacted straw thickness of 15 to 20 cm to buffer deep winter frosts.
- Bank with earth. Dig a drainage trench around the perimeter, shovelling the dug soil over the straw casing to a depth of 10 to 15 cm. Leave a generous tuft of straw exposed at the ridge apex to serve as a breathing chimney for stale heat and moisture. In prolonged wet weather, a ridge board or weighted sheet can be positioned to deflect heavy rain from the ventilated apex.
Never seal a clamp airtight. Tubers and roots continue to respire slowly; trapped moisture and lack of oxygen lead swiftly to anaerobic rotting. When opening the clamp in winter to retrieve a supply, do so on a dry, mild afternoon, digging through from one end and immediately packing fresh dry straw back into the breach before re-covering it with earth.
Packing Sand Boxes and Dark Stores for Sheds and Outbuildings
For gardeners with an unheated garage, frost-free shed or lean-to, indoor container storage avoids winter digging entirely. However, the management technique must be tailored to the crop: taproots like carrots thrive in moist media, whereas potatoes require breathable darkness and moderate dryness.
For carrots, beetroot, and swedes, damp sand packing is unmatched:
- Twist or cut the leafy tops back to roughly 1 cm from the crown to prevent regrowth, but do not cut into the root itself. Brush away loose dry earth without washing the skins.
- Use clean, horticultural sand or spent potting compost that is barely moist-it should clump loosely when squeezed in the hand without squeezing out droplets of water.
- In strong wooden crates, buckets or plastic tubs, lay a base of sand, then arrange roots horizontally or vertically so they do not touch.
- Cover each layer completely with sand, finishing with a 5 cm protective layer across the top. This keeps humidity high and excludes circulating air that causes shrivelling.
Maincrop potatoes must be treated differently in the outbuilding. Never bury potatoes in damp sand; excess surface moisture promotes bacterial soft rot, late blight development, and premature eye sprouting. Instead:
- Cure harvested potatoes in the dark at 10 to 15°C for 10 to 14 days after digging to heal harvesting scratches and thicken their skins.
- Transfer sound tubers into lightproof, breathable containers-thick, double-layered brown paper sacks, traditional hessian/burlap sacks, or dark slatted crates lined with cardboard.
- Avoid plastic bags or airtight boxes, which trap perspiration and induce sweating, mould, and premature breakdown.
- Position potato sacks in the darkest, coolest part of the shed, raised slightly off cold concrete floors on wooden pallets. Maintain a temperature between 4 and 7°C; if deep freezes threaten to push temperatures below 3°C, wrap sacks in fleece or move them temporarily into a cooler domestic room.
Curing and Keeping Winter Squash in the Farmhouse
Winter squash should not be treated like a root vegetable. Harvest only mature fruit, ideally before the first autumn frost. A mature squash usually has a woody, dry-looking stem and a skin that resists a thumbnail. The surface often becomes dull rather than glossy, although colour and other signs vary between varieties. Cut the fruit from the vine with clean secateurs, leaving a short section of stem, and carry it rather than dragging it across the ground.
Small cuts and bruises are common entry points for rot, so handle every fruit gently. Except for types such as acorn squash, which have different curing requirements, cure the harvest in a warm, well-ventilated place. A sunny windowsill, greenhouse bench or warm room can provide useful household-scale curing, with around 20 to 25°C suitable for many home situations. Professional guidance may use warmer conditions for a shorter curing period, so gardeners uncertain about maturity and handling should consult proper winter squash harvest guidance.
- Leave squash in a warm, dry place for roughly a week to ten days, turning them carefully if one side remains damp.
- Keep fruits out of frost and rain while the rind hardens and minor surface damage heals.
- After curing, move them to a cooler pantry or room, ideally around 10 to 15°C, with good ventilation.
- Arrange fruits so they do not touch. A gap allows air to circulate and makes inspection easier.
- Keep squash away from apples, pears and other ripening fruit where possible.
- Wipe dusty surfaces with a clean cloth. If using diluted vinegar, apply it lightly and allow the skin to dry completely before storage.
Do not store squash directly on a cold concrete floor. Use shelves, wooden slats, cardboard or shallow trays, and avoid wrapping fruit in plastic. Varieties differ greatly: acorn squash may last only several weeks, while butternut and hubbard types can remain usable for several months under good conditions. Check the stem, blossom end and any damaged patch each week. A slightly soft fruit belongs in the kitchen immediately, not back on the shelf.
Reclaim Natural Food Storage Through the Cold Months
Reliable winter storage does not require a purpose-built root cellar, a second fridge or an expensive domestic setup. It requires matching each crop to the microclimate it naturally prefers. Roots thrive when protected with earth, straw and damp packing material; potatoes remain dormant and nutritious when cured, shielded from all light, and held strictly above freezing; and squash rewards a warm curing followed by dry, steady air. A garage corner, a sheltered clamp and a few clean boxes can provide much of the same service as traditional farmhouse storage.
- Keep root crops cold, humid, and safely cushioned against deep frost.
- Keep potatoes cured, fully dark, well ventilated, and maintained strictly between 4 and 7°C to prevent both sweetening and sprouting.
- Keep winter squash cured, dry, moderately warm (10-15°C) and well ventilated on slatted shelves.
- Separate damaged or blemished produce immediately at harvest and inspect stored crops weekly.
- Use several smaller containers where possible, so one bad specimen cannot ruin an entire season’s supply.
Regular inspection is the quiet safeguard that makes passive storage dependable. Remove one soft carrot before it affects a sand box, cull a sprouting potato before it triggers its neighbours, or cook a blemished squash before fungal spots spread. With a little planning, non-electric storage becomes a rewarding part of the garden rhythm: harvest in autumn, protect with simple breathable materials, check through winter and enjoy fresh, homegrown produce right through to early spring.

